If you're into doing your own nails or work as a nail technician, you probably know how quickly nail supplies can take over your space. What starts as a few favorite polish shades can soon turn into a collection of dozens of colors, different finishes, nail files, press-on nail sets, glitter, and all kinds of little accessories.
And it's not just about finding room for everything. When several polish bottles look almost the same or your nail charms end up mixed in with your rhinestones, finding what you need can be a real hassle.
The good news? You don't need a complete storage makeover to get things under control. A few well-organized sections and a Mini Label Maker can go a long way in keeping your nail supplies easy to find. Here are four ways to get your nail space in better shape.
Organize Nail Polish by Color, Shade, and Finish
Nail polish collections have a way of growing before you know it. One new nude shade here, another glitter polish there, and suddenly you're spending more time searching for a color than actually using it.
A little sorting can make a big difference, especially when you have plenty of similar shades.
Create a Nail Polish Color Numbering System
If you've got a lot of nail polish, keeping track of every shade by name can get tricky. Why not give each bottle its own number instead?
You could use a simple three-digit system, such as 001, 002, and 003, and print the matching number on each bottle or cap. Then, put together a color chart so you can see exactly which shade goes with each number.
This little trick comes in handy when two or three polishes look almost identical. Just check your color chart, find the number, and grab the right bottle without having to inspect each one.
Sort Nail Polish by Color and Finish
Once you've got your shades numbered, take things a step further by grouping them by color and finish.
You might keep nude and neutral shades together, with separate sections for pink, red, purple, blue, and other colors. If your collection includes different textures and effects, give those their own spots too:
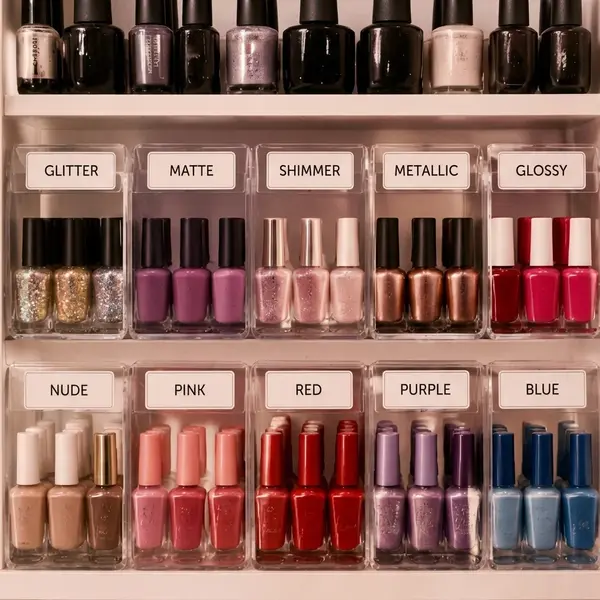
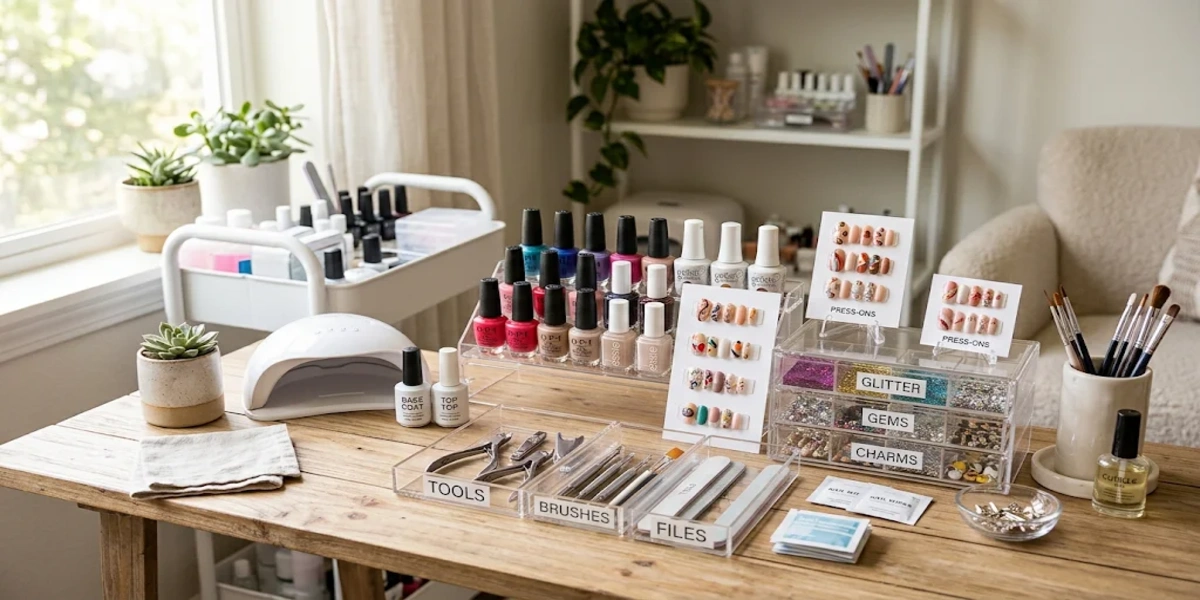
You can add labels like PINK, RED, GLITTER, or MATTE to your shelves or storage sections. That way, when you're looking for a particular finish or color family, you'll know exactly where to look.
Keep Press-On Nails and Nail Sizes Clearly Labeled
If you make press-on nails yourself or keep different sets ready for clients, you'll know that keeping track of sizes and designs isn't always easy. After a while, all those little boxes can start to look alike.
Organizing them by size and style makes it much easier to find the set you're after.
Label Press-On Nail Sizes for Easy Identification
Start with the basics: sort your press-on nails into XS, S, M, and L categories. If you make custom sets, you can also give individual compartments their own size labels.
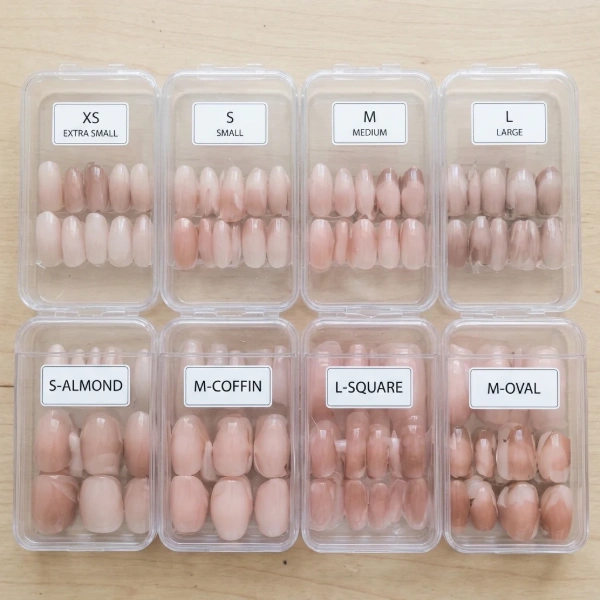
You can even add nail shapes to make things more specific. Labels like S-ALMOND or M-COFFIN help you tell different sizes and shapes apart.
Stick the labels on the outside of each box or compartment. You'll be able to check what you need at a glance instead of opening one box after another.
Organize Nail Sets by Style and Design
Size is only half the story. If you've built up a collection of press-on designs, sorting them by style is just as helpful.
Try grouping your sets into categories like:
For even easier tracking, give each set a short name or reference number. For example, FL-01 could stand for a floral design, while FT-02 could identify a French tip set.
This is particularly handy if you're a nail technician with different designs to show clients. And if you make press-on nails at home, it gives you a neat way to keep track of all the sets you've created.
Make Nail Tools Easier to Find with Simple Labels
Polish and nail art decorations aren't the only things that need a home. Nail files, cuticle pushers, brushes, and clippers can quickly turn into a messy pile if they don't have their own storage spots.
Keeping similar tools together saves you from rummaging through drawers every time you need something.
Sort Nail Tools by Type and Purpose
Take a look at the tools you use most often and group them by what they're used for.
For example:
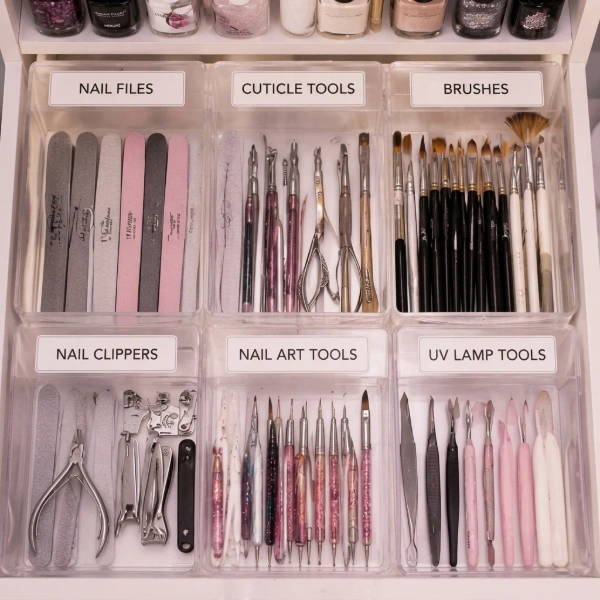
Small containers and drawer dividers are great for keeping everything separate. Add labels like NAIL FILES, BRUSHES, or CUTICLE TOOLS so you can quickly spot what you're looking for.
Create a More Organized Nail Salon Workstation
For nail technicians, a tidy workstation can make a busy day run much more smoothly. You don't want to be searching through drawers while a client is waiting.
One way to arrange your space is to divide supplies into three groups:
- Daily-use supplies: Keep your go-to files, brushes, and other essentials close at hand.
- Backup supplies: Put extra files, cotton pads, and replacement items in a separate drawer.
- Specialty tools: Store nail art equipment and tools you don't use as often in their own designated spots.
A few labels on drawers, shelves, and storage boxes can help you keep track of everything. It's also easier to put supplies back where they belong once you're done using them.
Keep Nail Art Decorations and Small Supplies Organized
Glitter, rhinestones, nail charms, and stickers are fun to collect, but they're also some of the easiest things to lose track of. They often come in tiny packages, and before long, everything ends up mixed together.
Instead of tossing them all into one big box, give each type of decoration its own little space.
Sort Nail Art Decorations into Small Categories
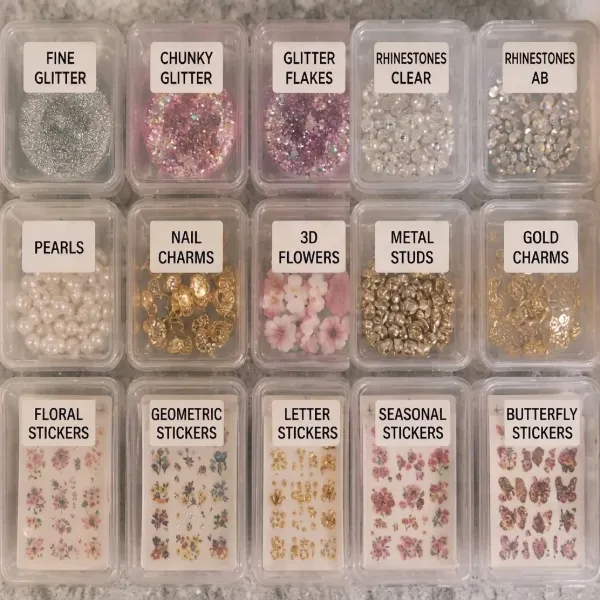
A good place to start is by separating decorations according to type:
- Glitter – Fine glitter, chunky glitter, and glitter flakes
- Rhinestones – Different colors, shapes, and sizes
- Nail Charms – Bows, flowers, and other 3D decorations
- Nail Stickers – Floral, geometric, and seasonal designs
Clear containers are especially useful here because you can see what's inside without opening them. Still, when several containers look alike, it's easy to grab the wrong one.
That's where a few small labels come in handy. Use names like GLITTER, PEARLS, CHARMS, or FLORAL STICKERS. For tiny compartments, abbreviated names or category numbers will do the job just fine.
Use a Mini Label Maker for Small Nail Supply Containers
Some of your nail supplies come in surprisingly small containers. Think tiny glitter jars, polish bottles, and compact storage boxes. There's not always enough room for a standard-sized label, so narrower labels are often a better fit.
That's where a Mini Label Maker like the NIIMBOT N1 can come in handy.
The NIIMBOT N1 is a half-inch handheld Bluetooth thermal-transfer label maker. Simply connect it to your smartphone via Bluetooth, customize your text, and print labels right from your phone.
Small Labels for a More Organized Nail Space
Here are a few ways to put it to use around your nail space:
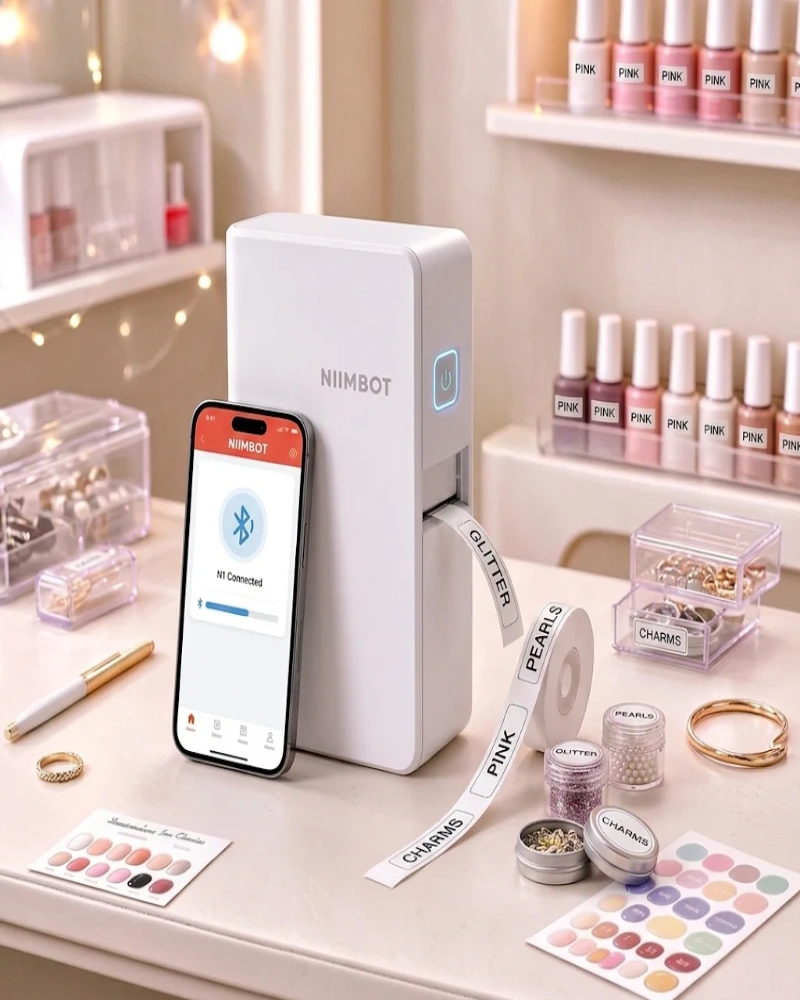
01 · Nail Polish
Print color names or shade numbers to tell similar-looking bottles apart.
02 · Nail Art Decorations
Label small containers with names like GLITTER, RHINESTONES, and CHARMS.
03 · Nail Tools
Mark drawers and organizers for files, brushes, and cuticle tools.
04 · Press-On Nails
Identify different sizes, styles, or set numbers.
The N1 supports label widths from 8 to 14 mm, which works well for many smaller storage containers. It uses thermal-transfer technology and a ribbon to print clear text labels without ink or toner. Whether you're sorting through a growing polish collection or trying to keep tiny nail art accessories in order, having labels that fit your containers makes the whole process easier.
Want to give your nail supplies a little more order?
Take a look at the NIIMBOT N1 Mini Label MakerFrequently Asked Questions
Narrow labels measuring 8–14 mm wide are a practical choice for small bottles, jars, and storage boxes. They're ideal for printing short color names, numbers, or category labels.
Yes. You can print polish shade names or numbers and place them on suitable flat surfaces, such as bottle caps or the sides of bottles, to identify similar colors more easily.
Look for a compact design, narrow label support, customizable text, and Bluetooth connectivity. The NIIMBOT N1 offers 8–14 mm label widths and thermal-transfer printing without ink or toner.